Wednesday, February 20, 2013

Homemade Raspberry Poptarts (Vegan AND Gluten Free!)


I didn't realize how much I missed poptarts until I made these. Oh man.

Ingredients

  • 2 cups flour
  • pinch of salt
  • 2/3 cup vegan butter or margarine
  • 4 tablespoons cold water
  • 1 and 1/2 cup frozen raspberries (filling)
  • 2 tablespoons water (filling)
  • 3 tablespoons sugar (filling)
  • 2 cups powdered sugar (icing)
  • Raspberry water (from filling, used for icing)

Directions

  1. Preheat oven to 375F
  2. Prepare baking sheet by covering with parchment paper.
  3. For the filling, place raspberries in a small saucepan over medium heat. Add a few tablespoons of water. 
  4. Once the berries have melted and broken apart, add the sugar and mix well. 
  5. Drain the excess raspberry juice/water into a bowl (this will be used for the icing). Set both saucepan and bowl aside.
  6. For the crust, mix flour and salt in a large bowl. Using a pastry cutter, cut in butter until well incorperated and crumbly. (I didn't have a pastry cutter so I used a hand-held potato masher and that worked just as well).
  7. Add four tablespoons of water and mix until dough is forms a ball.
  8. On a lightly floured countertop, roll out dough using a rolling pin until it is only about a centimeter thick. 
  9. Using a butter knife or pizza cutter, cut dough into evenly-sized rectangles (not sure of dimensions, but you know how big poptarts are, right? Also, clearly mine are not evenly sized. Oh well.)
  10. Place half of the rectangles on the baking sheet. 
  11. Spoon filling onto the center of the rectangles. 
  12. Cover the filling with the other half of the dough rectangles. Pinch sides together to seal.
  13. Poke about six holes in the top of each poptart with a toothpick or small skewer.
  14. Spread a thin layer of butter over each poptart
  15. Bake for 20 minutes or until golden-brown
  16. Mix leftover raspberry juice with powdered sugar for the icing/glaze. You made need more sugar, depending on how much juice there was.
  17. Glaze poptarts once they are cool.


Kid-Friendly Chocolate Cupcakes


Kate asked for chocolate cupcakes for her birthday. I asked her if I could use the same recipe that I used for the raspberry chocolate cake and the answer was a very loud "NO." Although I loved how rich the chocolate raspberry cake was, she thought it was too bitter. So this recipe has a lot less chocolate and a lot more sugar. Very kid-friendly. And just look at these cupcakes, aren't they cute? They are a little melted-looking because I am impatient and iced them before they had cooled completely. Silly me. 

Ingredients :
  • 3 cups flour
  • 2 cups sugar
  • 1/2 cup cocoa powder
  • 2 teaspoons baking soda
  • 1 teaspoon salt
  • 2 cups water
  • 3/4 cup vegetable oil
  • 2 tablespoons vinegar
  • 2 teaspoons vanilla
  • 3 cups powdered sugar (icing)
  • 1/4 to 1/2 cup almond milk (icing)
  • 1 teaspoon vanilla (icing)
  • Food coloring (icing)


Directions:
  1. Preheat oven to 350F.
  2. Mix flour, sugar, cocoa powder, baking soda, and salt in a large mixing bowl.
  3. Mix in water, oil, vinegar and vanilla. 
  4. Mix until the lumps go away.
  5. Prepare cupcake pan with cupcake papers.
  6. Using a spoon or ice cream scoop (I recommend the scoop. It's a little easier and it makes more evenly-sized cupcakes), spoon batter into cupcake papers. 
  7. Bake for 25 to 30 minutes, or until a toothpick comes out clean.
  8. For the icing, mix powdered sugar, almond milk and vanilla in a bowl using an electric mixer until smooth. Add food coloring as desired.
  9. WAIT TIL THE CUPCAKES HAVE COOLED BEFORE ICING. I didn't, and look how they turned out. 
  10. Store in the fridge overnight or until served (this sets the icing). 


Sunday, February 17, 2013

Kate's Birthday Party (No Recipe Here!)

At my job, I plan events for the community. Most of them involve families and children, and they have all gone pretty well with only a few hiccups here and there.

However, I have never planned a birthday party. When my aunt asked me to plan my cousin's party I said yes because don't I do this for a living?

The planning stage was a lot of fun. Kate wanted a mermaid theme so we decided to have one hour at the house and the other at the pool. I bought decorations, food, supplies for crafts. I made cupcakes, mini sandwiches, popcorn. I created a treasure hunt, and made crowns for the girls to decorate. It was a lot of fun to plan and decorate the house and cook the food. I loved it. I thought "people should hire me to plan birthday parties!"

The actual party was a different story. Don't let anyone tell you that 12 screaming 6 and 7-year-old girls in one room is a piece of cake (pun intended). They made a huge mess, ran around kicking balloons everywhere, and decided they didn't like the food after eating most of it.

I think that in the end, they did have fun, but I was so exhausted that I slept for 13 hours that night!

[PS I'll be posting the cupcake recipe later today!]


Thursday, February 14, 2013

Soft Serve Ice Cream from Bananas (vanilla and chocolate)


Vegan ice cream is expensive, and a luxury for most. Now this, this stuff is magical. And inexpensive. And only requires three ingredients.

Ingredients:

  • 2 bananas
  • 2 teaspoons vanilla
  • 1/2 tablespoon cocoa
Directions:
  1. Cut bananas into one-inch thick coins. Place on a plate. Freeze for about an hour.
  2. Blend frozen banana pieces in a blender until smooth. 
  3. Add vanilla, blend.
  4. Spoon half of the mixture into a bowl.
  5. Add cocoa to remaining banana in the blender.
  6. Blend until smooth.

Broiled Portobello Mushroom Sandwich


First of all: I love sandwiches, and this one was just YUM.

Ingredients:

  • 1/4 cup soy sauce
  • 1/3 cup sesame oil
  • 2 teaspoons rosemary
  • 1 teaspoon garlic powder
  • 1 portobello mushroom cap
  • a few pieces of lettuce
  • 1 tomato, sliced
  • 2 pieces of bread, toasted


Directions:

  1. Preheat broiler on high. 
  2. Mix soy sauce, sesame oil, garlic powder and rosemary in a small bowl. 
  3. Place mushroom in a glass baking pan. Pour soy sauce mixture over mushroom. Coat well. 
  4. Broil mushroom 8 minutes on each side. 
  5. Toast bread
  6. Use some of the extra soy sauce mixture on the bread.
  7. Put mushrooms, lettuce, and tomatos on the bread.


Cashew Macaroni and Cheese


This recipe is perfect if you're craving Kraft mac n' cheese. Kids and adults alike, will love it. 

Ingredients:
  • 1 cup cashews (I soaked them for 12 hours but it isn’t necessary, just use more almond milk)
  • 1 tablespoon apple cider vinegar
  • 1 tablespoon dijon mustard
  • 1 tablespoon lemon juice
  • 1 to 2 tablespoons nutritional yeast
  • 1/2 to 1 cup unsweetened almond milk, depending on the consistency of the cashews
  • 2 cloves garlic
  • salt, to taste
  • Steamed veggies of your choice (I used carrots and zucchini but I’ve used broccoli, cauliflower, and mushrooms before. They’re all good)
  • Pasta of your choice. It really doesn’t matter what kind. I’ve used elbow, spaghetti, and the curly kind. Gluten free works too, but is optional.
  • 4 to 8 ounces tofu (optional)
Procedure:
  1. Start the water boiling for the pasta.
  2. Start the vegetables steaming.
  3. Blend cashews in a blender until smooth, adding almond milk, vinegar, and lemon juice as you go. (if you have an awesome blender this should be easy. If not—like me—you might have to only put in a few cashews at first, and add a few at a time. I have a crappy blender).
  4. Add garlic, blend
  5. Blend in mustard, nutritional yeast, and salt.
  6. The water will probably have boiled at this point. Put in the pasta.
  7. Cook tofu however you want. I fried it in a little bit of olive oil. You can bake or grill it if you’d like. 
  8. Once the pasta is done, drain. Put the pasta in a large bowl (or back in the pot you cooked it in. Add the cheese sauce, veggies and tofu to the pasta, mix well.

Wednesday, February 13, 2013

Chocolate Chip Pancakes


Warning: These pancakes are very filling. I had two, and that made me full (the peanut butter didn't help any--oh! And I ate one while they were cooking, shh!).

Ingredients:

  • 2 cups flour
  • 3 tablespoons sugar
  • 1 tablespoon baking powder
  • 1/2 teaspoon salt
  • 2 1/4 cups almond milk
  • 3 tablespoons oil
  • 1 cup dark chocolate chips or chunks (I used a chocolate bar cut into pieces)
  • Oil for frying
  • Condiments: Peanut butter, jam, maple syrup, etc.
  • Fruit for topping


Procedure:

  1. Mix flour, sugar, baking powder, and salt in a mixing bowl. 
  2. Add almond milk slowly, mixing as you go.
  3. Mix in oil.
  4. Evenly distribute chocolate chips.
  5. Heat frying pan on medium, add a little bit of oil to the pan. 
  6. Pour batter in frying pan in the shape of a circle, about 3 or 4 inches in diameter. 
  7. When batter starts to get bubbly, it's time to flip.
  8. The first one is usually a dud. The pan is still warming up, and you've got to practice your flipping skills. It's okay. Just eat this one while you're frying as a "taste test" to make sure it's good. 
  9. Keep pancakes warm by storing them in a glass casserole dish or warming them on low in the oven.
  10. Top with your favorite condiments and fruit!


Homemade Kettle Corn


This popcorn doesn't look like much, but it is actually the best kettle corn you've ever had. And it doesn't have a zillion additives like the store-bought kind. Just three ingredients!

Ingredients:


  • 1/4 cup corn kernels
  • 1 tablespoon oil (I use olive oil and you can’t taste the difference)
  • 1/4 cup sugar (basically just use equal parts corn and sugar, if you’re making more)
Procedure:
  1. In a saucepan or pot, heat oil on high for a few seconds so that it gets hot.
  2. Add corn and stir it around a little so it’s covered in oil.
  3. Add sugar and stir.
  4. Put on the lid and shake the pot.
  5. Literally shake it. Keep it as close to the heat as you can, but physically pick up the pot and shake it.
  6. Don’t stop shaking. It’s okay to take a few breaks if your wrists start to hurt, but no more than a few seconds, or the sugar will burn.
  7. Keep the lid on. Don’t take it off. No matter how badly you want to. The kernels will start popping, don’t worry.
  8. Keep shaking until You can’t hear anymore popping sounds. 
  9. Once you don’t hear anymore popping, or if the time between pops is 5 seconds long, you’re done! 
  10. Transfer the kettle corn to a separate bowl.
  11. I like to add some cinnamon too sometimes (not in the above picture), but it’s not necessary.
  12. And there you go! It’ll be slightly crunchy but that’s what makes it gooooood :)

Tortilla Pizza with Soy Cheese, Tofu, and Mushrooms.


This was so simple. Mainly because the crust is just a tortilla. You could use a pita, a slice of bread, or pre-made dough and it would have pretty much the same effect.

Ingredients:

  • 1 Tortilla
  • 1/4 cup soy cheese (I used Sheese)
  • 4 ounces firm tofu
  • 2 small mushrooms
  • 1 teaspoon oregano
  • Olive oil
  • Tomato sauce (I didn't measure how much. Enough to cover most of the tortilla will do)

Procedure:

  1. Preheat oven to 345F. 
  2. Saute tofu in olive oil until brown and crispy. Add mushrooms. Stir until cooked. Set asid
  3. Grate cheese if needed.
  4. Place tortilla on a baking sheet and spread evenly with tomato sauce. Add cheese evenly.
  5. Sprinkle oregano over cheese.
  6. Add tofu/mushroom mixture on top of cheese.
  7. Bake for 15 to 20 minutes or until cheese has melted. 


Homemade Granola


This stuff is so addicting. It makes about six servings and we finished it in a day. 

Ingredients:

  • 3 cups oats
  • 1/2 cup flax seed
  • 1/2 cup almond meal
  • 1/3 cup chopped up walnuts
  • 1/3 cup chopped almonds (you can substitute these for any nuts)
  • 1/2 teaspoon salt
  • 1 tablespoon brown sugar
  • 1/4 cup maple syrup
  • 2 tablespoons agave
  • 1 tablespoon vegetable/canola oil
  • 1 teaspoon cinnamon
  • 1/3 to 2/3 cup raisins or other dried fruit

Procedure:
  1. Preheat oven to 325 F (165 C).
  2. Mix oats, flax, almond meal, and nuts in a large mixing bowl.
  3. In a saucepan, mix salt, brown sugar, maple syrup, agave, oil, and cinnamon over low to medium heat until melted together.
  4. Pour liquid over dry ingredients until coated.
  5. Spread mixture on a large pan and bake for about 20 minutes, stirring halfway through.
  6. This stuff is good on ice cream, or with soy milk (like cereal). Enjoy!

Tuesday, February 12, 2013

Tofu Scramble


Have you ever missed scrambled eggs? I know I have. I don't miss causing suffering of hens or the killing of male chicks anything, but I miss the quickness of just whipping something up that only takes a few minutes. Miss it no more, for I bring you tofu scramble! This stuff is addicting. Whenever I make it, I wish I had made more. The great thing about it is that it is so versatile. You can add veggies to it, use different spices, eat it plain, put it in a wrap. You can eat it for any meal, or just a snack. I can't promote tofu scramble enough!

Ingredients:
  • 8 ounces soft tofu
  • 2 tbs nutritional yeast
  • 1 tsp thyme
  • 2 tsps cumin
  • 1 tsp turmeric
  • 1 tsp garlic salt
  • Olive oil
Procedure:
  1. Drain and press tofu. Because it is soft, it will most likely crumble and be squishy but that doesn't matter. 
  2. Cut up tofu in whatever size pieces you feel like. They can be all the same size, or different sizes. They'll break apart when you cook them anyway.
  3. Fry the tofu with a little bit of oil in a frying pan. Stir often.
  4. Once tofu starts to brown, add seasonings and nutritional yeast. Stir to incorporate. 
  5. It's ready to eat as is, or put it on a sandwich or something! 

Chinese-Style Tofu Noodle Soup


This was ridiculously simple to make. It only took a few minutes. And Kate, my six-year-old cousin (who is rebelling against me by refusing all vegan food all the time) loved it. She kept going "Christy this is so good. Can you teach me how to make it? It's so good! Put it on your blog!" 

Ingredients:
  • 4 cups vegetable stock
  • 2 cups water
  • 16 ounces firm or extra firm tofu
  • 8 ounces rice vermicelli
  • 3 cups broccoli, cut into small pieces
  • 1/4 cup soy sauce
  • 1 tablespoon rice vinegar 
  • 2 cloves garlic
  • 1 tablespoon grated ginger
  • Olive oil
Procedure:
  1. Drain tofu and press between two paper towels to eliminate water.
  2. Fry over high heat in a little bit of olive oil until gold brown.
  3. Add garlic and ginger to the tofu. Set aside.
  4. In a medium sized pot, combine broth, water, soy sauce, and vinegar.
  5. Add tofu/garlic/ginger, broccoli and vermicelli to the pot.
  6. Cook on high heat until vermicelli is soft, and broccoli is cooked. 

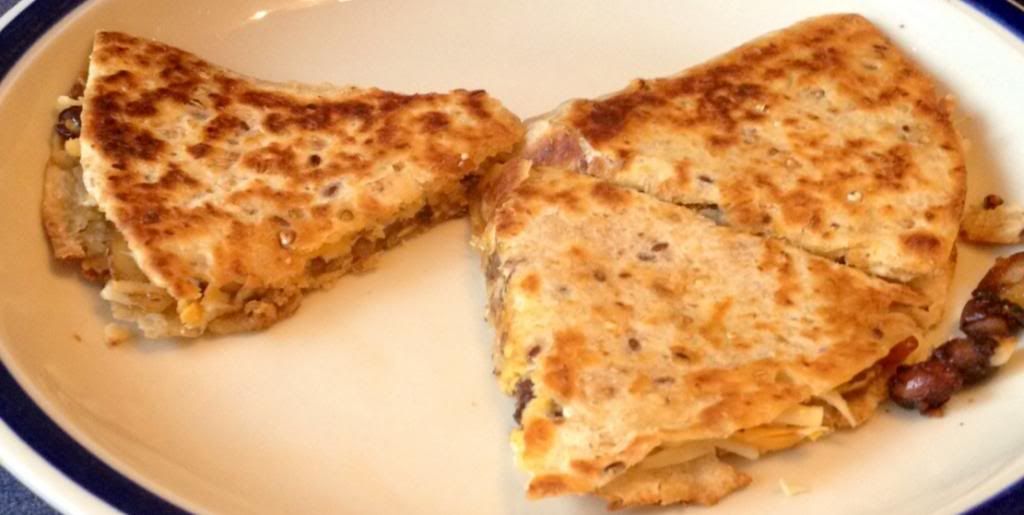
Soy Cheese and Black Bean Quesadilla


This recipes uses the same black bean mixture as the Tofu Black Bean Wrap

Ingredients:
  • 1 Tortilla 
  • 1 Red bell pepper
  • 1 small onion
  • 2 small mushrooms
  • 1/4 cup canned black beans, drained
  • Cayenne pepper
  • 1 cup soy cheese (I used Sheese brand, but I would have much rather used Daiya)
  • Olive oil
Procedure:
  1. In a frying pan, heat some olive oil on medium to high heat. Once hot, add onions and fry until translucent. 
  2. Add peppers and mushrooms to the frying pan, stirring until cooked (mushrooms will have turned dark brown and peppers won't have the raw crunch anymore, and be slightly translucent). 
  3. Add beans and stir. Add cayenne pepper and other spices according to taste.
  4. In a separate frying pan, spread oil around until it coats the bottom. Place tortilla in ban and spread 2/3 of the grated soy cheese over half of it. 
  5. Spread the black bean mixture on top of the cheese, then top with the remaining cheese. 
  6. Fold the tortilla over and press with spatula. 
  7. When you notice the cheese starting to melt, flip quesadilla.
  8. Once both sides are golden brown and all the cheese is melted, it is ready to serve! 
  9. Serve with salsa or guacamole!


Tofu Black Bean Wrap


Today's lunch was so delicious, I wanted seconds!

Ingredients:
  • 1 Tortilla 
  • 1 Red bell pepper
  • 1 small onion
  • 2 small mushrooms
  • 1/4 cup canned black beans, drained
  • Cayenne pepper
  • 1 Tomato
  • Hummus or your spread of choice
  • Tofu 
  • A couple pieces of lettuce or kale
  • Olive oil
Procedure:
  1. Drain for slices of tofu about the size of dominoes. Press between two paper towels to get all the water out.
  2. In a frying pan, fry tofu until golden-brown with a little bit of olive oil. Set aside.
  3. Cut up red pepper, mushroom, and onion. 
  4. In a frying pan, heat some olive oil on medium to high heat. Once hot, add onions and fry until translucent. 
  5. Add peppers and mushrooms to the frying pan, stirring until cooked (mushrooms will have turned dark brown and peppers won't have the raw crunch anymore, and be slightly translucent). 
  6. Add beans and stir. Add cayenne pepper and other spices according to taste.
  7. Spread hummus in the middle of the tortilla.  Cut up tomato and put on top of hummus. Pile the tofu, lettuce, and black bean mixture on top.
  8. Roll up and serve! 

Vegan Gluten Free Chocolate Raspberry Cake


Its time for the first recipe! This cake is to die for. It's so chocolate-y. It's pretty much just layers and layers of chocolate. Not even kidding.

Ingredients for the cake:
  • 1 and a half cups of gluten free all-purpose flour (or normal wheat flour, if desired)
  • 1 tsp baking soda
  • 1 1/2 tsp baking powder
  • 1/2 tsp salt
  • 1 cup brown sugar
  • 1 cup cocoa (more or less according to taste)
  • 1 tbs apple cider vinegar
  • 1 tsp vanilla
  • 6 tbs oil (canola or sunflower)
  • 1 cup water
Ingredients for the icing: 
  • 4 tbs coconut oil
  • 1 cup cocoa
  • 1/2 cup agave
  • 2 cups frozen or fresh raspberries
  • 2 tbs corn starch/corn flour
  • 1/2 tbs water
  • 1/4 cup almond or soy milk
Procedure for the cake:
  1. Preheat oven to 325F.
  2. Sift together flour, baking soda, baking powder, salt, brown sugar, and cocoa. Mix well.
  3. In a separate bowl, mix vinegar, vanilla, oil, and water.
  4. Add wet ingredients to the dry. Mix well.
  5. Prepare two circular cake pans by coating bottom and sides with a little bit of oil or vegan butter. 
  6. Pour batter evenly into pans
  7. Bake for 30-45 minutes or until a toothpick comes out clean. 
  8. Set aside to cool while preparing the icing
Procedure for the icing:
  1. In a saucepan, melt coconut oil, cocoa and agave over medium heat until smooth. Stir often. Set aside.
  2. In a separate saucepan, heat raspberries, water, and corn starch until thick, like a jam. 
  3. Once cakes are cool, remove one from its pan onto the serving plate or platter. 
  4. Spread a thin later of chocolate icing on the cake (use about 1/4 of what you have).
  5. Spread a thin layer of raspberry jam over the icing.
  6. Remove second cake from its pan and place on top of the other one (the raspberries will probably seep out. It's okay.
  7. Spread a thin layer of chocolate icing (about 1/4 of the original amount) and raspberry jam on top. 
  8. You should have half the amount of chocolate icing that you started with. 
  9. Put the chocolate icing back on the stove over medium heat. Slowly stir in almond milk until the color has turned from almost black, to brown. 
  10. Pour evenly over entire cake, making sure it coats the sides. It will most likely cover the plate as well. 
  11. Cool in the fridge until dessert!
I, and my omnivore relatives, love this recipe. It isn't perfect, so if you feel like you need to change something, feel free, and let me know in the comments! I hope you like it!


It has taken me a long time to figure out which layout I liked, which one didn't have a ton of things to edit in the html. I'm sure I still don't have this right. I thought I'd just dive right in and figure out as I go along. First recipe is coming today! Stay tuned.

Monday, February 11, 2013

I don't know how to use Blogger. Bear with me while I figure this out....